I spent a long time trying to come up with something to name this month's screed but ultimately decided that one word sums everything up: Fall. As in, "Fall is here." Because that about sums it up - Fall is officially upon us, and that made me pause in the midst of pouring my morning coffee.
I'm not a big 'Fall' guy. Oh, sure, the leaves turn and it gets chillier and prettier, and the nights are made all the more 'fall-y' with the scent of wood smoke from some far-off fire, lending a bit of an exotic perfume to the air; but for me it also means that the timer is running down on the hours I get to spend in my garage working on stuff before it gets too cold to work out there. The sun will soon be gone by five in the afternoon, and I won't see it again until nine the next morning - for MONTHS! I am aghast.
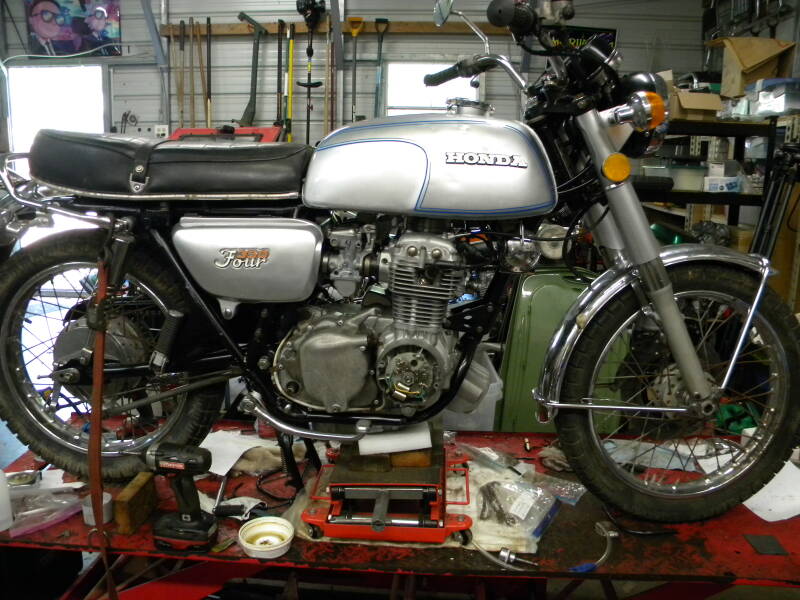
Be that as it may, last month I was telling you about all the fun I had trying to shoehorn the carbs back into their place on this 1972 Honda CB350 Four I'm working on; and it's come along way, but unfortunately, it's not back on the road yet. I have gotten it to fire, but it won't stay running for some reason, a reason I am still trying to figure out and which is driving me crazy.
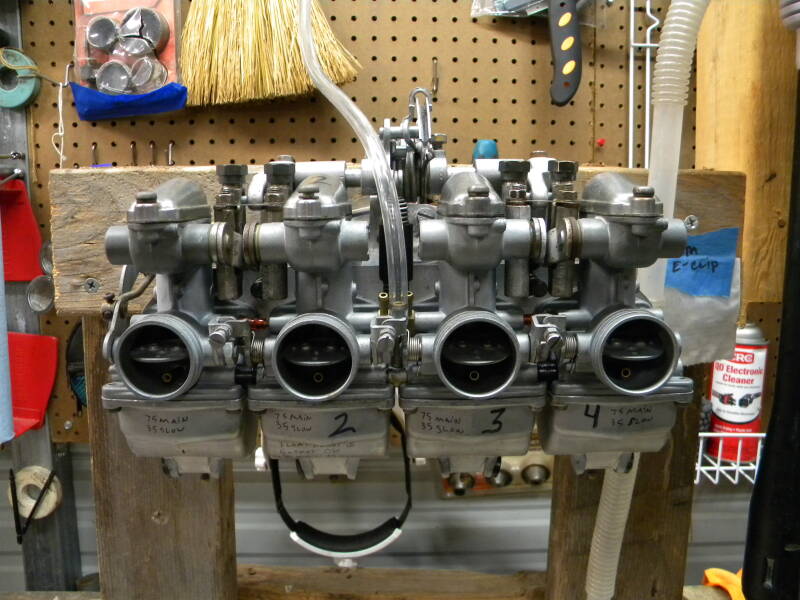
Here's the carb rack after I finished rebuilding it. This is actually the product of two different CB350 Four carbs that I was able to patch together after I found the insides of the one that was on the bike was in absolutely horrible shape, as the following pics attest; this was after I cleaned them...
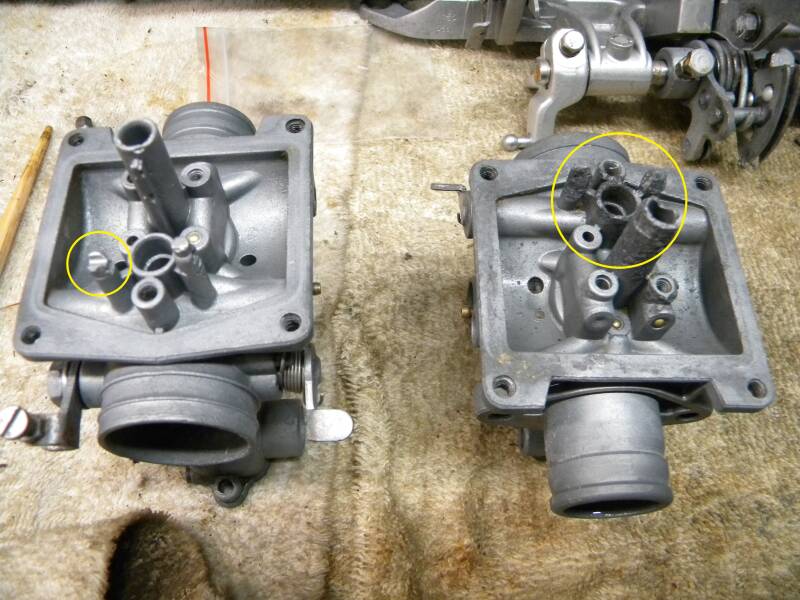
The one on the left has a broken float mount, and the ones on the right are simply not there! Check out the one on the right - - Time has eaten away all the metal in the jet housings. Granted, almost all these old carbs are made out of a pot-metal zinc/aluminum alloy mixture, but 'Holy Planned Obsolescence Batman!'
I managed to cobble together a working set and even when I bench tested them using the clear-tube method (which simply measures the height of fuel in the carb bowls) they sealed up fine, i.e the fuel stopped flowing into the carbs where it should have stopped, about one or two millimeters below the carb bowl seam, so I was pretty happy with that. Put 'em on the bike though and their true nature was revealed in gas coming out of three out of four of the overflow tubes in the bowls!
Here's a pic of the inside of the carburetor bowl - this is the original shape I found these carbs in when I first opened her up. Like, "ewwww"! Each of the yellow squares show where each set of floats lie within the carburetor bowl. (Don't forget, you're looking at this upside down...).
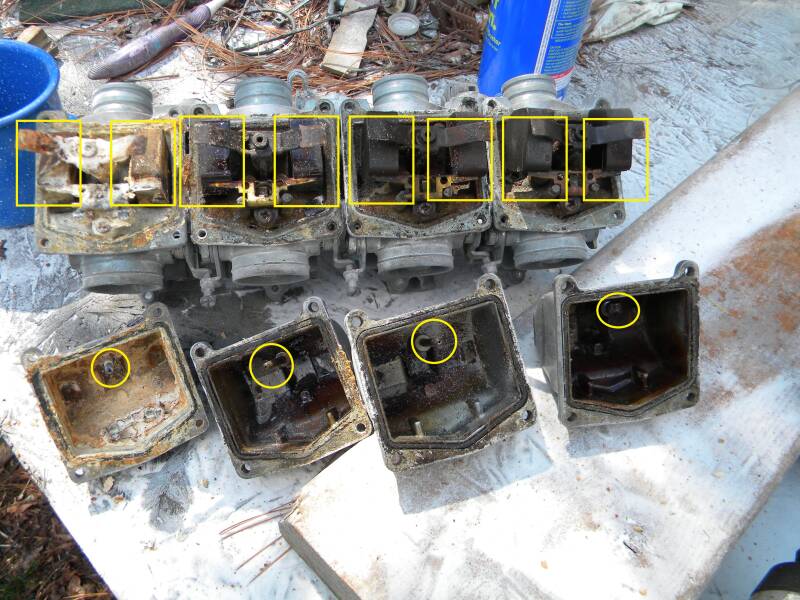
The yellow circles are where each of the carburetor bowl overflow tubes are - except for the last on the right, it was bent over and GONE!
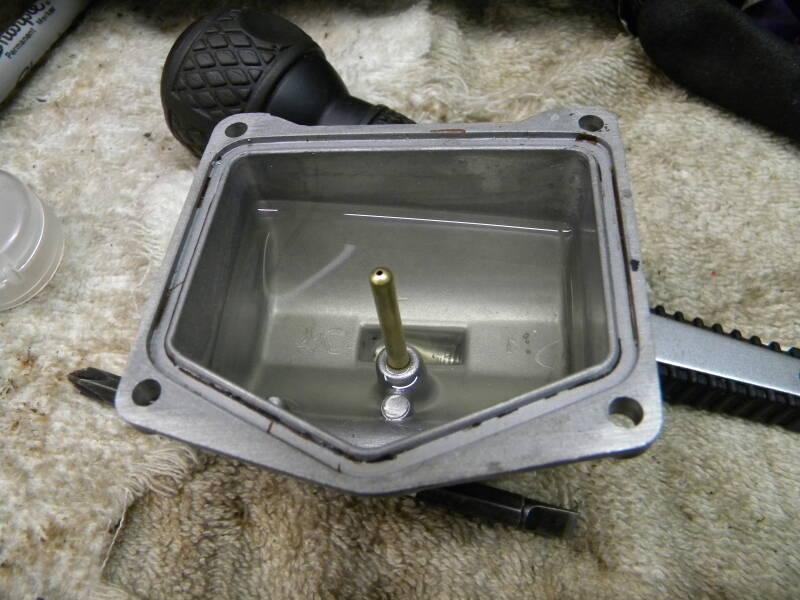
Here's a view of the overflow tube in the carb - when the carb is together, the floats hang down into the bowl attached to the float valve needle and seat, seen in the carburetor jet diagram below.
When fuel flows into the carburetor it fills the bowl, making the floats rise; the float valve needle sits in the float valve jet (seat) and is attached to the floats by a little tab; as the fuel rises in the bowls the float valve needle eventually goes into a little hole in the float valve jet(seat) and cuts off the flow of fuel. As the fuel level drops (when the bike is running), the floats drop and the jet needle drops too. It lets in more fuel and the process repeats itself, supplying fuel to the engine and the bike runs.
You can't really see it in the above picture, but that brass tube is even with the inside lip of the carburetor bowl. If the floats stick and fail to rise with the incoming fuel, that leaves the jet needle in a 'down' position, leaving the needle jet(seat) open and allowing more fuel into the bowl. If the floats do NOT rise and insert the float needle into the needle jet, that brass overflow tube allows the excess fuel to drain out, hopefully before it flows into the throat of the carburetor and into the engine where it can hydro-lock the cylinders. Fluid cannot be compressed, so if enough gas gets into the engine, the engine won't turn over. (Whew! Did you get all that??)
And if you're REALLY unlucky that gas drains past the rings and into the oil pan, which means you have to dump all that oil and put in fresh oil - and these days that can get pricy.
It's easy enough to fix though - as long as your rings are in good shape all you have to do is take out the spark plugs and crank the engine over to push the excess fuel out of the cylinders. Just be sure to NOT be standing in front of the plug hole when you do this - it comes out of there with some force; ask me how I know! Yah - Good Times!
But ultimately I did manage to get her started (first time in forty years! Whoo-Hooo!), but she didn't want to STAY started. Every time I tried to rev it, she would die, and this just Would Not Do! I could nurse it past the idle with a little judicious manipulation of the throttle and she would rev up but take my hand off and she died. Here's the YouTube link if you want to check it out: 1972 CB350 Four Weird Hesitation
Hmmmm; What To Do....
I hemmed and hawed and bitched about it for a while but the answer was obvious: I was going to have to take the carbs out AGAIN, and go through them, AGAIN! So that's what I did.
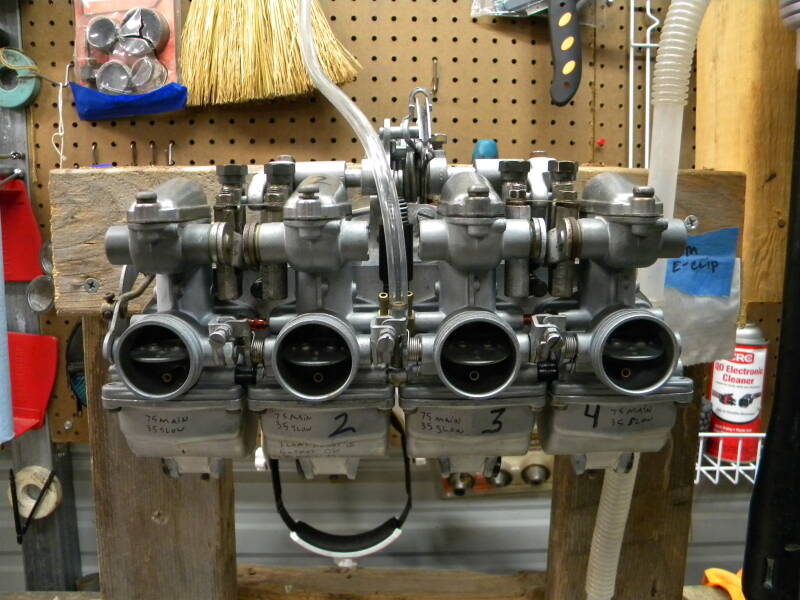
Here they are lined up on my super-fancy carb mount - note the numbered carb bowls with the jet sizes on them.
Oh, it wasn't that bad, I guess; mostly just a PITA to unhook everything, especially the dang manifold boot bands, which have a screw located underneath that's a pain to get to, but in the end it all came out fine, I guess. it's funny how you do something a few times the easier it gets. But it's a good thing I did, too, because regardless of my previous attempts to clean these things, I discovered that the #1 carb jets were rather 'degoulasse', as the Belgians say. It has no direct English translation, but it's somewhere between 'gross' and 'disgusting'.
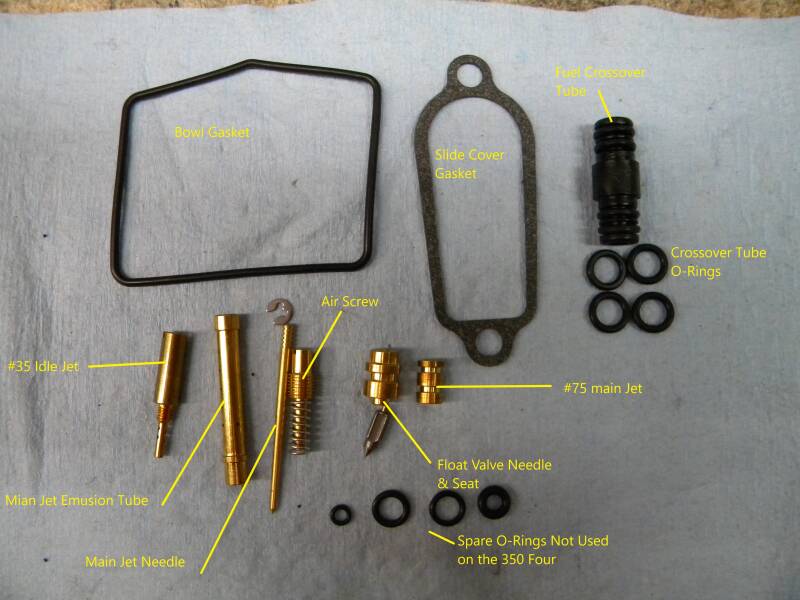
This pic is obviously not the parts I pulled out of the carb - this is an aftermarket set I'm using here to give you a better idea of what I'm talking about. See those two brass tubes on the left, there...? Those are respectively (L to R) the #35 idle jet and the main jet emulsion tube, with the #75 'main jet' itself all the way to the right. (The numbers are the jet sizes). The main jet on the far right sits on top of the emulsion tube in the carburetor and is responsible for mixing the fuel with air on its way up the tube to the carb throat, where it gets sucked into the cylinder via the valves and piston rings and gets ignited by the spark plugs and the bike moves.
That idle jet and emulsion tube have a lot of tiny holes in them to help mix the fuel, and I discovered that despite my best efforts at cleaning them previously they had become clogged again, which contributed to my weird throttle-off/dying problem I was having, not to mention being unable to synchronize the carbs because I couldn't keep it running. And you can't do just one carb, you have to do them all! AGAIN! It's tedious, painstaking work but truth be told I didn't really mind. Throw some Johnny Hodges on the CD player and dig in. I like working on carbs.
Long story short, I went through all the jets with some fine wire and threw them in the 'ol ultrasonic and let them bake for a good ten minutes, went through the carb holes, put them all back together and got them on the bike - but this time it wouldn't run AT ALL! GAAAH!! Oh, it would fire or try to - but it wouldn't run.
It's all good though - I remembered that I had set the carburetor slides to their fully closed position when I had it on the bench, and of course the bike wouldn't run because there was no way for the gas to make it to the cylinders! DOH!!
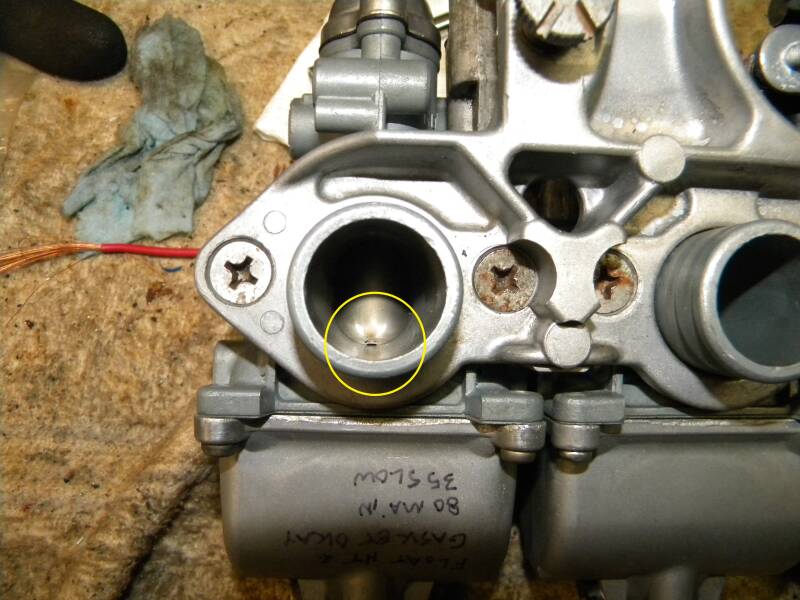
See how tightly that slide is all the way down in the carb throat? Yeah, that's my bad - there should be a bit more of a gap there. I should have bench-synched it better - but I didn't, and that caused (easily solved!) problems. I adjusted the slides and was happy to report that with a little throttle she fired right up and idled and revved well. I was psyched! I love hearing a bike that hasn't moved in forty years fire up, that's the payoff for me.
I still have to throw a carburetor tuner on her to get her dialed in. I was going to tune it, but one of the cheap plastic adapters on my tuner broke off in the #1 manifold (!), causing me some serious momentary stress, but it was made of plastic, so I was able to get it out pretty easily, thankfully. I have some hardier brass ones on the way.
Remember: if you're trying to save an old bike - it's the little things.
Add comment
Comments
You are so right!...it's the little things :)